Next Show March 28th and 29th


Home i Classes i Tickets i vendors i Unique-Opportunities i FAQ's i Pricing/Details i Blog

Showing posts with label Ange. Show all posts

Mar 14, 2014

MME Now & Then Mildred

 It's so close now I can almost smell the new paper!
I am so excited for expo! I want to pack already. lol But since it's a bit early for that I played with some new paper instead. 

  
Check out this pretty paper from My Mind's Eye! It's Now & Then Mildred, Girls. I wanted to try my hand at one of those cut backgrounds, so I did this on my silhouette. I also cut the wording that way. I just did the design myself. Here are some closeups:


I wanted the the feel of this layout to be sweet and soft, which is the feel I get from the photo. So I loved the light pinks and soft blue in the paper underneath and I went with stitching and soft embellies. I didn't want a lot of journaling, so I just put the important details on a heart and outlined it with a glittery pink gel pen.


I had this fun rhinestone butterfly in my stash and thought it would be a great addition. Then added the twine for a flight path. I always love to see a flight path for butterflies, just makes me smile. I double matted my photo, well maybe triple if you count the white edge it came with, in pink and then just a small edge of black to really drawn the eye.


In this last closeup you can see the stitching I did. I also outlined each heart with the glittery pink pen. The enamels, buttons and little lady sticker are all from MME also. 
Make sure you swing by their booth at the Expo and get some of these yummy products for yourself!
See you there! :)Ange

Mar 6, 2014

MME Cut & Paste Layout

 Hello! Are you getting excited about attending the Original Scrapbook USA Expo? I AM!! I can't wait. There's nothing better than good friends, fun times and GREAT shopping!! Speaking of shopping, My Mind's Eye is going to be there and I just happen to have a pretty cool layout here using their Cut and Paste line.


 I had so much fun making this layout. I started out getting messy (really you should see my fingers lol) and then layered the patterns from Cut & Paste using a sketch from My Scraps & More sketches blog.


 These layered stickers are really cool and fun. I went with the heart theme and added more in wood veneers, rounded all my corners and did a lot of inking.


Added a bit of bling


and finished up with this date label and ink around the entire layout.

I'm ready to get me some more fun product at the My Mind's Eye booth! How about you?
:)Ange

Feb 28, 2014

Show Layout Contest

Is your layout ready for our 2014 Show Layout Contest??

Remember, this year our layout contest is based on a sketch.

You can see the sketch and get the details and rules HERE

But before you go, check out Ange's take on the contest sketch for a little bit of fun creative inspiration!!


I used the sketch and stretched it into a 2 page layout. I just took the strips from the sketch and brought them all the way across to my 2nd page. Then balanced it out by adding elements in the lower right. Make sure when you embellish that you don't clump similar items together too much. It also helped that I let my journaling go over to my 2nd page too. 
Have fun creating! :)Ange

Feb 17, 2014

Look What's NEW at Basic Grey!

Hello! Ange here today. Are you getting excited for the expo? I sure am! I can't wait to go play, hang with some good friends and shop some great deals!!
Have you seen the new Highline from Basic Grey? I fell in LOVE when I saw it. Such a pretty line! I'm not a big fan of pink, but all the orange and color change in this line is so awesome! (It makes the pink ok lol)
As I was thumbing through my pictures, I saw these pics of my daughter at a dance competition and thought dark backgrounds with light pink outfits, perfect!


I know these photos aren't the best. The lighting on the stage was really bad, harsh in some spots and way too dark in others, but I managed to get some photos that were not blurry and I love how you can see my daughter's pretty form. (She's front and center) Of course I had to use the photos and I found a sketch that had super tiny photos on it over at My Scraps & More, so I went for it.


The main draw for me was the design across the bottom. I loved the arrows leading the eye across the page and photos, so I used the fun Love This arrow sticker and then cut some chevrons out of some cute pink pattern paper to draw the eye. That hexagon sticker was just too perfect and it is a great way to focus the eye on my title. For the title I layered the black and pink alphas. Did you see all the alphas you get with this line?! Awesome!!


The banner here was hanging at the festival and I took a picture of it to use on my page. I used one of the border stickers across the top, but since it is a true 12x12 I had to cut it to make it longer and fit end to end at this angle. I just hid the cut behind this fun pink heart. I tried to stick with the light pink embellishments because it looks so awesome against the darker background of the page.

  I really love this line from Basic Grey and can't wait to dive in again!!
Thanks, Ange

Feb 7, 2014

NEW from Basic Grey!

 Hello! Ange here today and I have a super cute layout using Basic Grey's Capture line! This line is so fun. Totally built for those everyday moments that don't always fit under a particular theme. I used some photos of my husband doing pushups with one of our boys on his back and the other helping him balance. It's about the little things, right?


That sticker is what made me choose this line for these photos. Perfect! Everything you see is from the line except the ink and twine. Here are some closeups:


Here you can see that fun sticker at work, along with some others that I thought went well with the photos.

For my title I used the "You're so Amazing" tag sticker and backed it on another pp before adhering it with foam adhesive to give it some pop. I love the circle stickers and rings, they go well with the main design. I used sketch #302 from Nuts About Sketches for this layout.

Thanks for stopping by!
:)Ange

Feb 3, 2014

Christmas Leftovers For Valentine's

 So, when all the hustle and bustle is over and you find yourself with an overabundance of Christmas scrapping supplies, what do you do with them? Use them of course! 
Kristin asked us to make something Valentine's theme and while this isn't exactly Valentine's I figured it was pretty darn close. So here's a little Mohawk Love for you:


 I started with a kraft background, put some mist on it and then added papers from DCWV's Jolly Whimsy stack. Yep, Christmas, but look how perfectly they fit into this love theme!


For the diamond mat, all I did was cut along the design of the paper. Then I cut some of the smaller diamonds out and added them to my layout for embellishment. You can see one in the closeup above popped out of the mat using foam adhesive.
I'm a washi addict and I love using it to frame my layouts. Gives it a great finished look, don't you think?

Do you have extra letter stickers leftover? Yep, the entire title is from Echo Park's Christmas Reflections line. Last I added my journaling and my date with a date stamp. (love them!) I used a sketch by Lanette Erickson from 3 Scrappy Boys for this layout.

Thanks for looking and happy scrapping! 
:)Ange

Dec 21, 2013

DIY Wrap

 Hi! Have you seen DCWV's Holiday Glitzy Glitter stack? It is GORGEOUS!! I love it.
I've been using it for backgrounds on layouts and cards and now I'm using it as gift wrapping.
Perfect, right? I made 6 boxes, put some little toys in them and gave them to the kids I watch. They loved them.


My favorite thing about these papers, besides how beautiful they are, is that you don't end up with glitter all over you. It's really just amazing. It all stays put on the paper and it's easy to work with. 
I also added some cute tags using the Jolly Whimsy stack. 


I thought these boxes were really easy to make. My 12yr daughter found them here:
Boxes and made a couple. I pulled them apart to figure it out on my own. 

Keep in mind a 12x12 sheet of paper gets you a box that is 3x3x3, perfect for the small gifts and so fun with this awesome glittery stack (that doesn't flake off when you're working with it!).
  Thanks for stopping by!

Happy Holidays,
Ange

Dec 20, 2013

Layout & Card with Echo Park

  And we're off! Tis the season to be merry, bright and decorating right? 
Which is why I decided to scrap this cute photo of my husband lifting our youngest to put the angel on the top of the tree. He was so adorable waiting to put "Cinderella" at the top.


 I used Echo Park's Reflections Christmas line & sketch #294 from Nuts About Sketches for this layout. I picked this bold print,  Days of Christmas, for my background and nearly changed it out a couple of times, but I'm glad I stuck with it. To offset the bold print and bring attention to the photo I used a much more subtle print, North Pole, in the center. I cut 1 larger star & 2 smaller ones from the scraps of North Pole and colored them and then added lots of cute stickers, along with a washi tape border. Here's a couple closeups and the sketch:


Then I put together this card using the easy project life style papers in the kit.


The base Santa paper from Peace Joy Love paper was a little big, so I trimmed it down a little to fit my card. The red pattern was fussy cut from the Christmas Story paper. I just flipped it over after cutting it out and used the back side. Both papers are inked with black. Then I added the Merry Christmas sticker and used foam adhesive under the red pattern to add to my card. I cut the green circle sticker apart and used it along with one other little circle sticker and some green stickles. 

I hope you're enjoying your holiday season!
:)Ange

Dec 18, 2013

DCWV Jolly Whimsy Layout

Have you seen Jolly Whimsy by DCWV? It is SO cute! I think I am in love with this stack. So today I have a layout for you using papers from this adorable stack.

I am a big wrapping paper person and I'll tell you why. Kids LOVE to tear paper! It's just fun and I love to see the look of excitement and surprise on their face when they reveal the wonder beneath the pretty paper. Maybe wrapping paper speaks to my scrappy side too? lol


The look of excitement on my son's face is what really grabbed my attention with these photos. I wanted to really bring that excitement to my page and I thought what better way than through torn wrapping paper?


So I picked this cute Letter to Santa pp for my background and then some fun prints that I could tear up and layer on my page. Then I cut the snowflake circles, Santa, and ornament from another pattern and added them to the page, a few with foam adhesive for dimension. 


In the upper right corner I layered some washi before adding my ornament for a little extra fun. Super simple and easy page that really brings out the joy of gifting. 
Happy Holidays! :)Ange

DCWV - pp, brad
doodlebug - washi tape
uniball - red pen
kaiser craft - ink
tombow - tape runner
ek success - foam adhesive

Dec 16, 2013

Homemade Holiday Cards - You still have Time!

 Hello! I have some more fun Holiday cards for you today. I used DCWV Holiday Glitzy Glitter and Jolly Whimsy stacks for these cute cards:


The temperature was about 10 degrees outside when I took these photos and it made the glitter paper curl up. I was a little worried things were going to pop off or they weren't going to straighten back out, but almost the second I got them back in the house they flattened back up. 


 For this card I used this gorgeous red and silver striped background and then cut out the sentiment from the Jolly Whimsy stack. I hand drew and cut a pattern for the stockings so I could cut them out of the fun prints in the stack & hung them from twine. And the 24 I cut from a paper in the stack also.


I really like the look of the rolled pp, so I made a tree from some of the adorable patterns in the line and then added the noel wreath from the icons paper. The trunk is made from the barcode edge of the glittered pp, love it when those are useful! And a glittery star button from my stash.


This glitter pattern was so pretty I actually wanted to just use it as the whole card. lol But I added the cute little snowman from the icons pp, backed with the fun gold snowflake pp & then added the snowflakes and a bit of liquid pearls for fun.

Thanks for stopping by today! I'm off to mail these.
:)Ange

Dec 14, 2013

Cards

 I have some cute, simple Christmas cards for you today!


I've been having a lot of fun making Christmas cards this year and using the Basic Grey's 25th and Pine line has made it so easy.


 For this card and used this pretty pine tree chevron printed paper with edges inked in dark green, I love it!  Then I picked one of the banners. Because they're made for a 12x12 page I had to snip it down to size. I just snipped the string in the middle of the banner next to the ones I wanted, then unpicked the string from that banner so I could use it somewhere else. I added a couple of the cute brads, wooden snowflake and the chipboard letters to finish off my card.


 This card is where I used the banners that no longer had string through them. First I flipped them over and closed up the string holes with my fingernail. One banner is used as a tree here, 2 at the top and then I wanted some quick presents so I actually cut them out of a different banner. I also used another pp for my background, inked in dark green again, then used a punch on a different pattern for the top piece and added one of the super cute stamps and a wooden star. Oh and that cute chevron print for the tree trunk.


This card was probably the easiest. I used the snippets card, inked in black, for the bottom and added the Joy letters. Then layered some washi tape across the top, attached the Holiday wooden word and another cute stamp.

Happy Holidays!
Ange Weisbeck

Dec 3, 2013

Hello Santa!

  Hello!
It's that time of year again! Are you ready for Christmas? I'm not, but I am ready to scrap some fun Christmas memories!!! There's just something special about watching the little guys meet Santa isn't there? I love the mystical/magical feel of it.


My son was so excited to meet Santa last year, but so overwhelmed at the same time. It was just super duper adorable! This 25th & Pine line from Basic Grey was perfect for these cute photos.
 I received a lot of embellishment packages, but just a few 6x6 papers. So there is only one (yes I said 1!) 6x6 paper on this layout.


 I started with a background sheet from the DCWV Holiday Glitzy Glitter stack. I love that its so glittery and shiny but it does not come off when you touch it! Wonderful!! Then I laid out my photos and picked this cute journaling card that I knew belonged on this layout. It was a little long for the space I wanted it in. So I cut it off along the striped piece, moved it up to wear it fit on the paper and looked good, then glued it back down.


From there I decided this fun 6x6 pp was perfect. I love the navy, red & pink combo. Its such a pretty and fun twist on the traditional holiday colors and I feel like even tho this is a boy layout the pink works perfectly for it. I knew I wanted the largest section of my pp along the bottom, so I've got a piece that's about 3x6 down there and I cut the rest into 1 inch strips and laid them out around the photos.


It worked perfectly leaving a space in this upper left corner for a title strip that I cut out of the snippets package & attached using foam adhesive to add some dimension. Again that red and pink combo was perfect so that's the banner I chose. I snipped it apart where it was going to hang behind the journaling card to make it a little longer. I wanted to attach it higher up on my layout but still have it hang below my photos. After that I added the fun brads, wood veneers and some liquid pearl dots for a bit of sparkle. 
Here's a quick look at the whole layout again:


It's amazing what you can do with a 6x6 pad of paper and some fun embellishments, isn't it? Thanks so much for stopping by! I hope you enjoy some magical moments this holiday season. :)Ange

Supplies:
Basic Grey - pp, journal card, banner, wood veneers, brads
DCWV - glitter bg sheet
ranger - liquid pearls
tombow - tape runner
elmers - glue dots
ek success - foam adhesive

Nov 29, 2013

Time to "Recharge"

 Hello! Today I have a layout using The Sky's the Limit stack from DCWV. There are so many beautiful papers in this stack and so many different uses for it. 
For today's layout I picked a photo of my son taking a much needed nap in December of last year. 


The holidays can be so busy and hectic that we all need a nap now and then just to keep going. Anyone who's been around a toddler for even 5 seconds knows that a nap is just a battery recharge for them. lol My son is no exception. He's a bit like the energizer bunny. So I cherish every little sleepy moment he has.


I picked 3 different patterns from the stack that all had a night time/star theme. I used this pretty starred and doodled one for my background and then cut the other two into smaller sections for layering under my photo.


I used border punches and a corner rounder to add a little more detail and really enjoyed sprucing up these yellow stars and lights with my yellow stickles. For a bit more embellishment I added glossy accents to the moon and then remembered I had these fun bubble stickers with "sleepy" sayings and put a few of them on the layout.

 Here I layered some triangles, cut from a cloud paper I used on another project, to bring attention to the title. I didn't feel the need to do a lot of journaling for this photo. I think this sleepy little head says is all.

I hope you have a fun and crafty day! Don't forget to slow down and recharge your batteries now and then. :)Ange

Nov 27, 2013

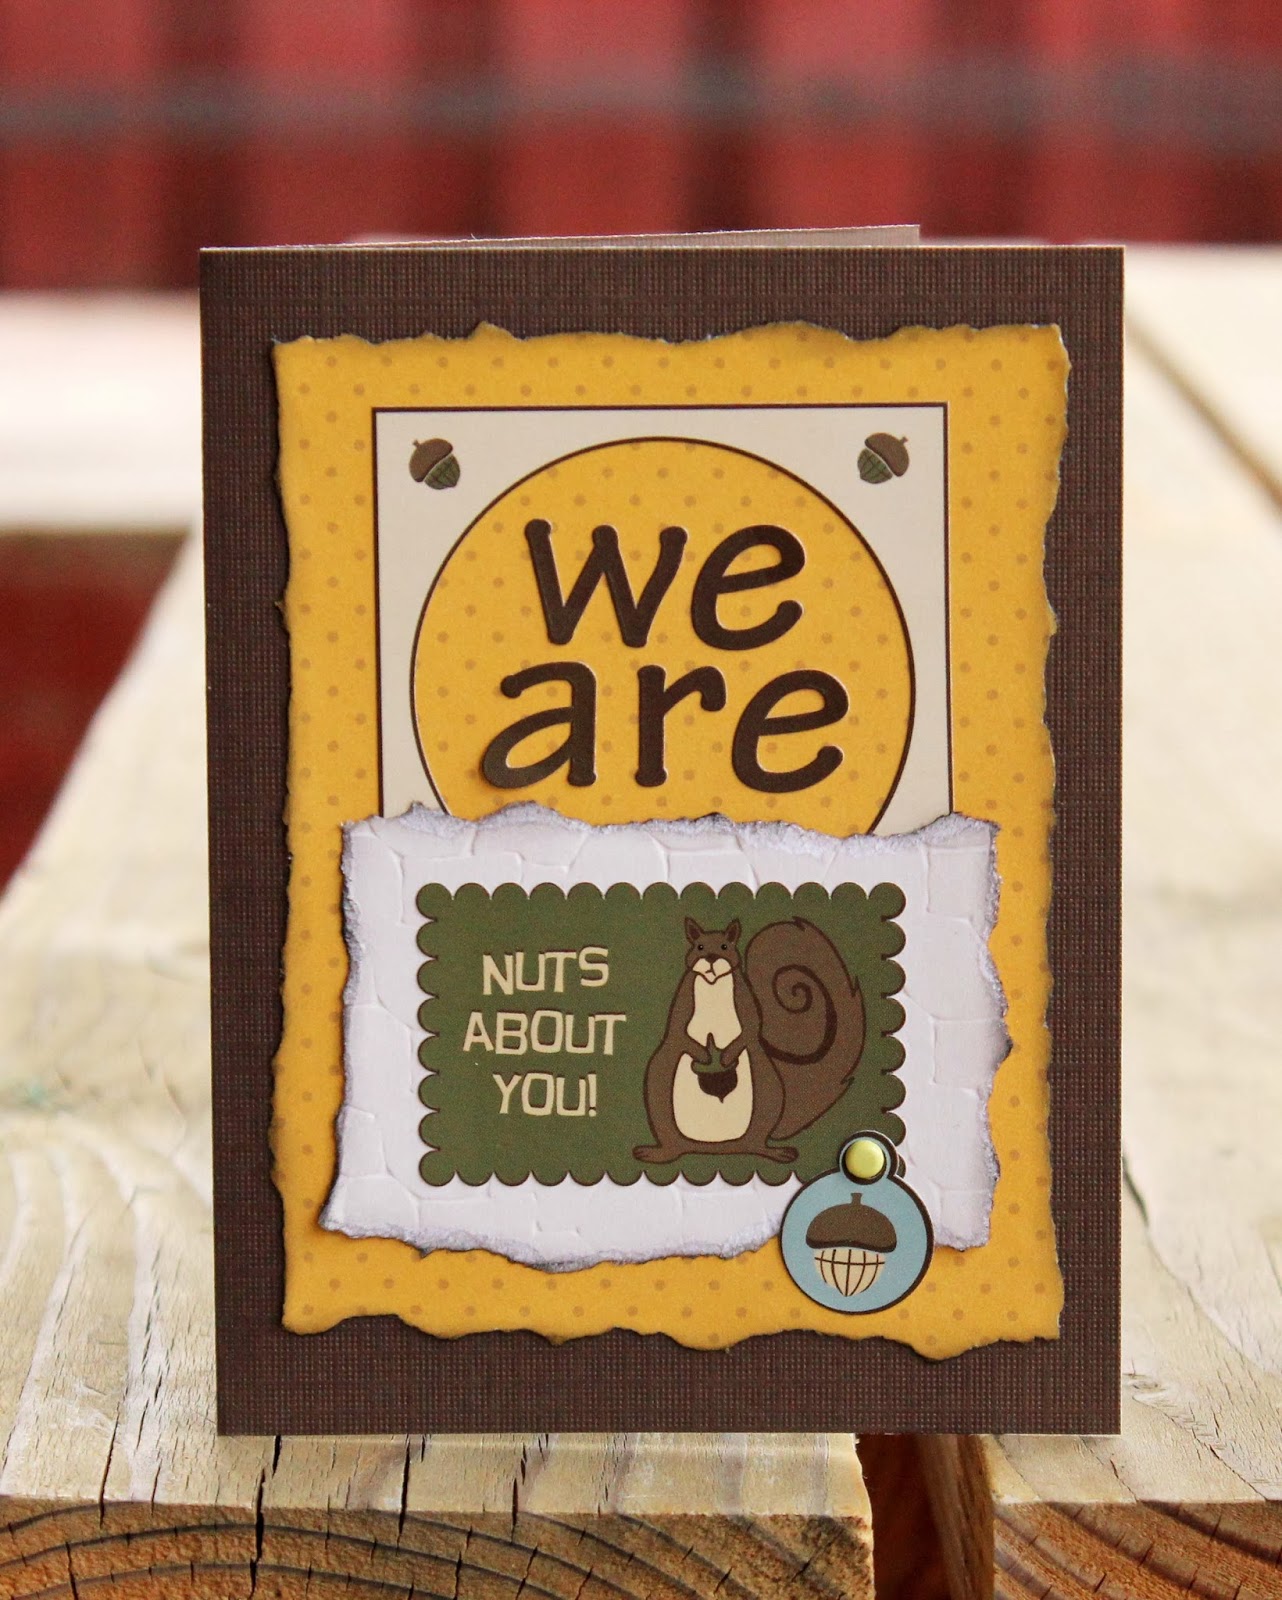
Nuts About You!

 Hi! Ange here today with a couple of fun cards.
I used Moxxie's Forever Fall line & DCWV's Pebbled stack for these cute cards.


On this first one I picked my base (brown DCWV cs), added some sanded Pebbled cs from DCWV, which I think really spruced up the front of this card! I love all the texture it adds. Then I used some scraps of Foilage along the bottom and fussy cut the cute leaves from Unbe-leaf-able & Fall cards for my leaf pile. I used the My Dear Friend rub-on and this adorable little deer sticker. I love this little deer, I've been waiting for the perfect place to use him.


This card is a birthday card for my daughter. I love this Nuts About You! sticker and thought it would be perfect for this card. The yellow polka dotted paper is the backside of Fall cards, the additional stickers are off of the Alpha sticker sheet and the white cs is from the Pebbled DCWV stack, as is the brown cs base.
I added a couple more stickers with a birthday sentiment inside.

These cards were fun and easy to make using Moxxie's awesome cardstock stickers and this super fun Pebbled stack from DCWV.
:)Ange

Supplies:
DCWV - cs Pebbled stack and brown bases, brad
Moxxie - pp, cs stickers, rub-on, alpha cs stickers Forever Fall
ranger - brown ink
colorbox - black ink
tombow - tape runner
stash - emery board

Nov 26, 2013

Hangin Out!

 Hello! I have a crazy fun layout for you today. 
I love hanging out with my crazy kids and their friends. There's always something exciting bound to happen and this outing was no exception. Last year a small group of us went to a local pumpkin festival and I got this series of funny photos.


I loved each photo in the series and wanted to let the photos tell the story. The Homeroom stack from DCWV was the perfect line for this. Besides the fact that the photos center around a school bus, I just loved the pattern paper from the stack that has all of these fun word bubbles on it.


 I started with a kraft base and added drips of mist in bright colors. It's really easy, just take the lid off, unscrew the top, hold it over your paper and press the top like you would to mist, but then it splatters out the tube at the bottom. The more ink in the tube the bigger the splatter.


I matted my series of photos on one pattern of paper and then chose another pattern for the main photo at the bottom. Then I picked out the banners and title and cut them from another paper in the stack.


They have an entire sheet of word bubbles in this stack! Some are blank and some have cute sayings already. I used a lot on this layout and I think it really added to the layout and the "school" theme. I finished up by inking all my edges with black, including my photos. Which I sanded a bit first so the ink would stay in place.

Happy Scrapping! :)Ange

Supplies:
DCWV - Homeroom stack
ranger - mists
colorbox - black ink
paper studio - kraft
my little shoebox - mini alphas
tombow - tape runner
ek success - foam adhesive
zig - black pen
stash - emery board